Monday 29 November 2021

Week 45 - The Build

 I left it last week pondering the shield around the steering column. The gap between the column and the brake pedal is narrow so the shield needs to allow full travel of the brake pedal and full rotation of the steering column and be strong enough to resist a bit of a kicking.

Not so easy  - however using some plastic cups and a lot of masking tape I did manage to make what was a mould for some GRP. Difficult to see in the photo as the cups are transparent!


Anyway, here it is being glassed up...

.. it came out of the mould lovely and trimmed up with the angry grinder. The bad news is that it doesn't fit! The mould was quite fragile and I think the weight of the fibreglass must have distorted it!

Quite dissapointing really as it took a week to mess that up. I'm now wondering if I need one at all! A quick survey shows that most cars dont have one..

Onwards.


Friday 19 November 2021

Week 44 - The Build

This week it's been more work on the interior. The cockpit sole is supplied as a single piece of grp. 


Can't think how this is supposed to go in as a single piece - too big for me anyway! Easy solution is to cut it in half!


It can always be glassed back together if required. Here they bits are in a trial fit.


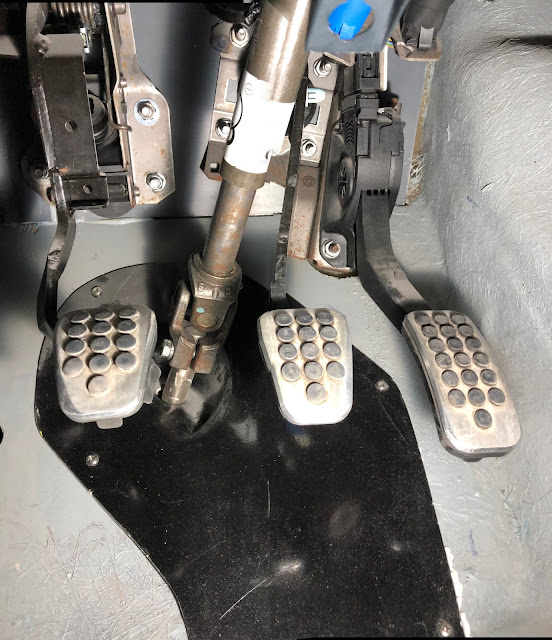
 Still a few bits to be done before final fitting, including making a shield around the steering column down by the pedals. 

Here you can see how close to the pedals is the joint where the column joins the rack! It's almost possible to steer with a foot or even jam a shoe in there.

I'm hoping to make a glassfibre shield but need to improve my template making skills while lying upside down in the dark.


Tuesday 9 November 2021

Week 43 - The Build

First job this week was to adjust one of the switches operated by the brake pedal. Part of the switch was up against the steering column which is not good. Here you can see where it's mounting bracket has been bent over a bit to give a good clearance.


Next job is to secure the morse cable that connects the rudder to the steering. The forward end connects to the starboard suspension spring which rotates as the steering is applied. the other end is secured to the rudder. Here is is!

Next job was the tightening up and tidying up of stuff in the wheel arches. Notably the trackrod ball joints, wishbone pinch bolt and tying back the brake pipe and wheel speed sensor cable. I've got some white PU sealer coming to seal all the through hull holes which will be done in a single seeion later.


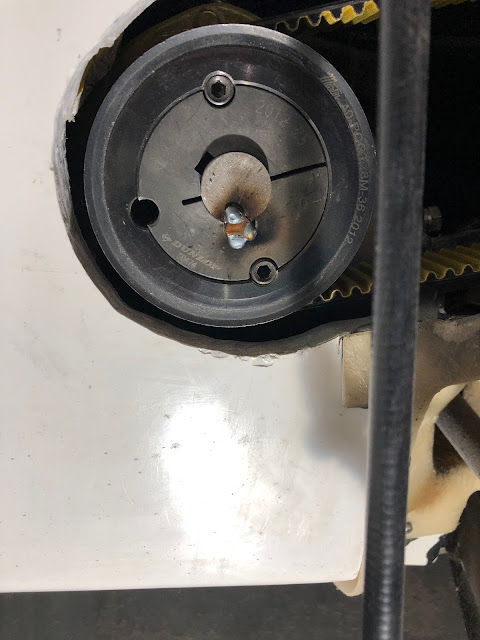
The avid reader of this blog will remember the key falling out of the pto pulley. This has now been sorted out with a couple of dabs of weld between the key and the shaft and the key and the pulley.

An important feature of any modern motor vehicle is to have the ability to know the outside temperature. I've mounted the sensor on the outside of the scuttle near the fuel filler.

Because I can, I've taken the wires from the original 'bonnet open' switch to a pair of spring mounted bolts that are shorted out by a copper plate glued to the inside of the bonnet. Here you can see the plate and the contacts..

and here the contacts in more detail.


Monday 1 November 2021

Week 42 - The Build

 Last week saw the impotant work on installing the dashboard cheek pieces. This week sees the installation of the rear speakers and the marine instruments. 

The rear speakers are from the donor Fiesta and fit behind the holes in the cockpit sides.


and its the same the other side. They'll get covered by the upholstery later. There doesn't seem a saensible place to put the original front speakers and so some smaller ones are on order which will fit. A photo will follow!

I have a NASA instruments echo sounder and log combined into a single instrument that will measure the water depth and boat speed when in the water. The echo sounder transducer is mounted in a tube bonded onto the inside of the hull at the back of the cockpit.


Here it is snuggled in behind the bilge pump. The space between the bottom of the transducer the the hull will be filled with oil.

The speed transducer requires a hole to be drilled through the hull. Not something I'm massively keen on in principle but its that ot no speed transducer. 


Well, thats the hole drilled ...

... and the tube fitted ...


... and with the paddle wheel transducer. Next is the display unit. I decided to mount this on top of the dashboard, partly as this gives easy access for all the cables and power supply. I made a bracket out of 4mm ply and covered it in the same van liner as the dashboard cheeks. The power comes off the ignition switch. I installed a switch to turn the display on or indeed off. Here is a quick view of it working.


 ... and here mounted in its bracket that is velcro'd to the dashboard. Cover on and cover off.


Next week its more small stuff, but I'm thinking its needs a bit of a road test to get the engine up to temperature and test the brakes fairly soon.


Week 57 - The Test

 Got all the paperwork off to register it as a car now to test it as a boat!! Here are a couple of videos and some photos of it in action....