Thursday, 25 February 2021

Week 21 - The Build

 With the engine out again the job is to check and reset the camshaft timing. With the cam cover off and inserting the cam locking tool correctly then using a screwdiver in the spark plug hole for No 1 cylinder it is plain that the timing is 180 degrees out! No wonder it didn't want to start! 

Easy enough to sort out. Just need to lock the crankshaft using a locking tool - just a matter of taking the starter motor off and bolting the tool to the motor mounting bolts. First problem is that my locking tool wont reach the flywheel! Wrong tool. eBay to the rescue so two days later the right tool arrives and the crankshaft locked. Now the bolt holding the crankshaft pulley can be removed. Now the locking tool is removed and the crank can be rotated to TDC and nestles up against the positioning pin in the crankcase. Locking tool back on - belt back on then the lower cam belt cover and the auxillary drive pulley then all I need is the bolt. Google Engineering says that you should use a new bolt everytime as the are done up so tight they stretch as a design feature. It seems you can only get these bolts as part of a cambelt replacement kit which has the belt, tensioner and water pump as well. Found one on eBay that looks about right so I'm waiting for that to arrive now.

All in all a pretty uneventful week! Hopefully get it all back together and in the hull again next week.


Saturday, 20 February 2021

Week 20 - The Build

I suppose a project like this was always going to be a bit of a rollercoaster ride. One day its seems all but finished and the next day an unrecognised problem arises that needs to be solved. Everyday is a school day if you don't really know how anything works!

And so it was this past week. The ambition was to connect enough to the engine to get it started. All that went well. Fuel, electronics, 12v supply and earth - even attached the clutch and servo vacuum hoses.

Turn the ignition on and operate the starter. Great - give it a while for the fuel to get through. OK, give it a bit longer. OK, a bit of brake cleaner sprayed into the intake. Fires up! Horray. But without the brake cleaner it wont start at all, not even a splutter. 

 So, I know it ran fine before I changed the cam belt, but could it be an electrical problem or a dodgy connection somewhere? I checked all the plugs and sockets and connections and they seemed fine although I remade a couple of connections to be sure. Still no joy. Checked the fuel supply. The fuel pump is suprisingly powerful as it shot a jet a fuel 15' in the air. The cam timing is looking favourite now and a bit of Google Engineering reveals thet when cylinder 1 is at TDC then the cam lobes should point away from each other. Took the cam cover off and they plainly dont.

Thought I'd see what the OBD thought and it came up with this;

Almost every error in the book came up, but top of the list was a cam position error so that pretty much confirms the cam timing is out.

It's going to be a massive fiddle doing the repair in the hull so the engine, now known as yoyo, is coming out again.

And out it is waiting for next weeks adventure.
 

Friday, 12 February 2021

Week 19 - The Build

So, the next job is to get the engine running. Before I can get the radiator on I need to connect the brake servo vacuum pipe, the fuel pipes, the clutch hose and the heater pipes. I think all the rest can be done from the rear.

A modification to the cooling system is the addition of a loop of pipe mounted below the hull. This connects to the hose to the top of the radiator. I haven't got these bits yet.

A lot of the jobs are almost invisible but here we go with the pictures;

Starting with the fuel system at the tank ...


and at the engine ...


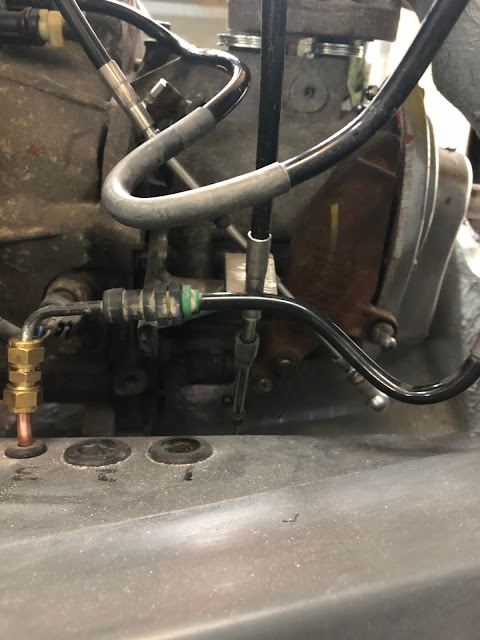
The vacuum hose to the brake servo ...


The pipe to the clutch release bearing ...

Pipes to the expansion bottle ...


Next week it's the electrical connections!


Saturday, 6 February 2021

Week 18 - The Build

Hopefully things will start getting back on track this week. The plan is to get the engine in with drive shafts attached.

Having messed up the drive shafts before it is with some trepidation that I set about doing it right his time. The shafts come prefitted with hopefully waterproof bearings close to the inner end. These insert through openings in the hull that are not large enough to accomodate both ends of the assembled shafts.


This picture shows the parts of the shaft. The inboard end is to the left and you can see the waterproof bearing. Also see the rubber gaiter, the tripod bearing (with the legs protected with masking tape and the circlip to hold it the bearing on the shaft. 

 First job is to inert the shafts through the hull opening and slide the rubber gaiter over the end. 


Here is one shaft in position. To the right you can see another gaiter already clipped to the hull. The other end clips to the outer rim of the bearing you can see.

To help ease the sliding of the tripod bearings onto the shaft I first soaked them for a few minutes in boiling water to help expand them. It nevertheless came as a massive suprise to see they slipped on quite easily using only a medium sized hammer.

Here is one done already for squishing in the grease. 

Now its engine back in time!

However you look at it, the engine is a tight fit! With quite a lot of pushing and shoving and effing and jeffing its back in. It position is really dictated by the tie bar at the bottom. In fact, with this bolted in there will be almost no movement possible.


It's then a good idea to bolt up the other two mountings. A good move with the Stbd. side one is to have inserted the bolts through the hull seat and loosly thread the nuts on from below. Putting the nuts on with the engine in position wis very difficult. The port side mounting is very straighforward.

Port side...


Stbd side ....


Next the inner drive shaft cv needs to be slid together. Having got them in I coupled up the suspension leg and bottom arm loosley to stop them sliding out again.


 To finish the week I then clamped the hull gaiter to the shaft bearing. Actually not all that easy as the inside of the gaiter had become covered in grease which had to be removed with paint thinners first.


Really pleased with the weeks work. Feel I passed a bit of a milestone with all the major components now installed. Just need to connect every up now. Just the cooling system, fuel pipes, clutch hydraulic hose, brakes pipes and serv, electronics, battery power, lights, engine management units as well as all the stuff I've already forgotten about.


Week 57 - The Test

 Got all the paperwork off to register it as a car now to test it as a boat!! Here are a couple of videos and some photos of it in action......